You can never have too many clamps. There are many different types used for specific purposes, and then there are those that are so versatile, no shop would be without them. Do you know what clamp to use when? Ottawa Fastener Supply has tons of clamps available for any type of project. We believe you should know as much as possible about clamps to make better decisions for your upcoming project requirements.
Here are 10 common questions asked about what may be your greatest shop treasure:
1. What are clamps used for?
Clamps are handy tools used to secure parts of a project you are working on. Often, they are used in woodworking and carpentry applications to hold a piece of wood to a workbench for sawing or chiseling. They may also be used in metalworking for welding, grinding, or fabrication since they can hold many different types of metals, like steel, iron, aluminum, and copper. You might use a clamp for drilling, filing, gluing, or painting. Basically, anytime you need something held still so that you can perform one of these tasks, a clamp is the first device you should reach for.
2. How many different types of clamps are there?
The different types of clamps available are numerous. It is possible to have 36 types in your shop or toolbox. For example, you may have a sash clamp for window or door work. You may have a spring clamp that you can operate with one hand and use it for carpentry, jewelry making, or other crafts. Bench clamps will hold your items in place on your bench. Many woodworking shops have bench vices to secure wood together, so you can saw, drill, sand, or plane them. Finally, G or C clamps may be the most commonly used clamp in many woodworking shops.
3. How many different types of clamps do I need to keep in my toolbox at home?
Depending on who you speak with, you may get many different answers as to what types of clamps you should keep in your toolbox. In short, we believe you can never have enough clamps, but if you were to only have a few, here is what we recommend:
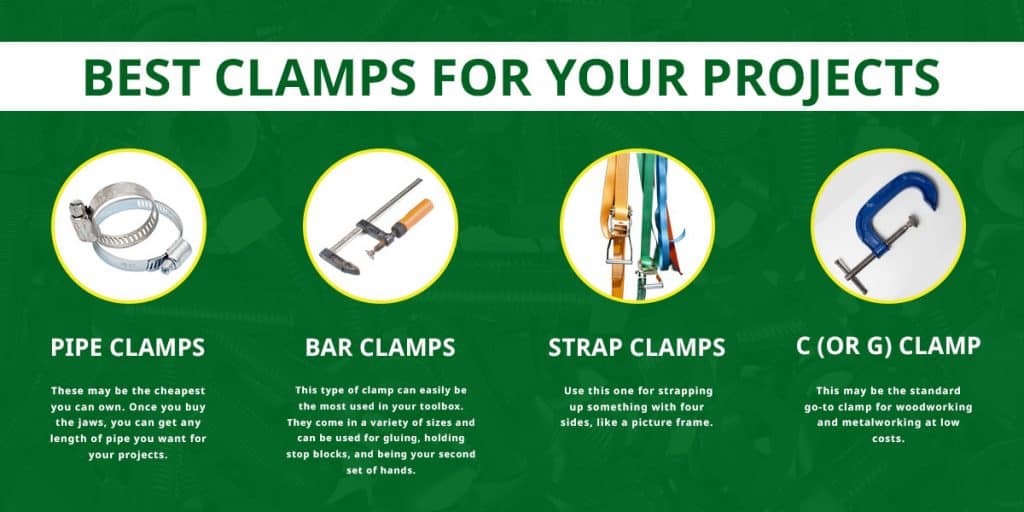
- Pipe Clamps – These may be the cheapest you can own. Once you buy the jaws, you can get any length of pipe you want for your projects.
- Bar Clamps – This type of clamp can easily be the most used in your toolbox. They come in a variety of sizes and can be used for gluing, holding stop blocks, and being your second set of hands.
- Strap Clamps – Use this one for strapping up something with four sides, like a picture frame.
- C (or G) Clamp – This may be the standard go-to clamp for woodworking and metalworking at low costs.
4. What type of clamp should I get, if I’m only going to have one type?
If you are starting out building your arsenal of clamps with a limited budget, begin with purchasing pipe clamp fixtures, eight should do the trick. A good size to start with is 2 cm (¾”) fixtures. Next you will need the pipes to go with the clamps. Grab a couple of 2 cm (¾”) pipes in 61 cm (24”) and 121 cm (48”) lengths. To make the pipes longer for bigger projects, grab about four couplers. Bonus Tip: Purchase four 31 cm (12”) long one-handed ratcheting bar clamps for quick clamping situations. These two types together should aid almost all your shop needs until you can purchase more.
5. What are some other types of clamps and what are they used for?
You may be tempted to buy a few of every type, which may leave you overwhelmed when the time comes to use them. While the shop motto is that you can never have enough clamps, it is more important to have the right clamp for the job you are doing. Consider these types and their best-use for your projects:
- Trigger-Activated Bar Clamp (Quick Clamps) – This amazing clamp can be tightened with one hand while you use your other hand to hold the piece. You can find bar lengths ranging from 15 cm to 127 cm (6” to 50”).
- Parallel-Jaw Clamp – Use these versatile tools for large glue-ups. They have jaws that remain fixed at 90 degrees to the bar and parallel to each other.
- C-Clamp or Carriage Clamp – They are great for narrower workpieces when you need lots of pressure at many points, such as a laminating job. Boat builders use these for attaching thin laminations to curved hulls.
- Corner Clamp – When mitering pieces together, these clamps ensure you get square corners because their jaws are set at 90-degree angles.
6. Which is better: bar clamp or pipe clamp?
It depends on the application. Pipe clamps can be added to your toolbox for minimal monetary outlay. They are very versatile since you can get any length of pipe and create a new clamp. They are especially good for making cabinet components and temporary tabletops. You can even use these clamps for storing ropes and hoses, overhead pipe support, and fixing small leaks. While they offer much in clamping pressure, if you don’t position these clamps in the right place, you could face challenges.
Bar clamps hold large and heavy pieces and can be crossed over another bar clamp for big projects. They are generally used in joinery, carpentry, and sometimes, metalworking. Use these for making furniture and welding. Bar clamps can get pricey, and you are limited by the bar length, so you will have to buy more than a few to fulfil your project requirements. However, they do offer more in pound pressure compared to pipe clamps.
7. How long before I need to replace my clamps?
That depends on how well you care for your clamps. If you leave glue build-up on them, then eventually, you will get frustrated with trying to use them, and you may throw them out. Rust can appear over time. This can affect the sliding action of a clamp and make annoying hinging noises when you use them. Ideally, well-maintained clamps could last you your lifetime. Think of your clamps as tools that could potentially never wear out when given the proper attention with regular cleaning, oiling, and storing. Nothing is foolproof, though, and eventually your clamps will show evidence of wear and tear because of the many projects you create. When that happens, get rid of them and replace them with new ones that will function optimally to deliver the results you want.
8. How do I take care of my clamps?
For new bar clamps, begin with removing any labels on the bar, then wiping it down with a clean cloth dipped in mineral spirits. Your goal is to remove any adhesive and the bar is clean. You may even want to add a coat of paste wax to the bar and buff it clean, so you keep glue from sticking later.
While using your clamps, you can prevent glue build-up by using a protective barrier between your clamp and the piece. This barrier can be painter’s tape, packing tape, or parchment paper. After you are done using a clamp on a project, remove it immediately, wipe it down with a dry cloth, and add oil or paste wax as needed to moving parts. Then store them away from heat sources attached to a shelf if possible.
Glue build-up can interfere with your clamp’s ability to move and may damage your project. You can remove dried glue by softening it with a hot rag or heat gun, and then scraping the glue off with a putty knife. For rust, you may try a spray-on rust remover and steel wool.
9. How long should a clamp stay on?
Clamps are temporary tools that are meant to be used short-term. For woodworking projects, you need to remove it once your project is dry or cured. This can be in as little as 30 minutes or may take as long as 24 hours, depending on the glue’s specifications and the humidity in the air. The key principle to remember is to not leave them on for longer than necessary.
10. How do I keep my project from getting damaged by the clamps?
There is nothing like pouring your heart and soul into a project only to have it marred by your clamps. To avoid this, be sure your clamps are clean. Wipe them off if you need to. Then, apply a thin layer of wood glue. Add a scrap piece of wood, called a clamping caul, between your project and your clamp. Open the clamp wide, slide over the piece and clamping caul, and tighten the clamp down. Other options include placing painter’s tape on the part of your clamp that will be in contact with the project or use a piece of leather in between.
Ensure your glue sets well when you apply pressure from the right clamp for the project. If you aren’t sure what works best, then give us a call at one of our convenient locations. We love sharing knowledge and answering questions related to your next project!
Originally Posted here: https://www.ottawafastenersupply.com/10-things-you-should-know-about-clamps-for-better-project-productivity/